Thanks for engaging in HP support Forums! This is a wonderful location to converse with the community, get assistance and find tips! I understand you are having issues printing from your HP OfficeJet printer. Don't worry as I have a few suggestions which should help you resolve this issue.
To provide you with an accurate solution, I'll need a few more details:
Have you recently made any changes on the printer before the issue started?
Are you using genuine HP Ink cartridges or refilled cartridges?
Have you tried to clean the ink cartridge contacts?
Are you able to make a copy from the printer?
After reviewing your case, this looks like a possible hardware failure. Before you could contact our HP phone support for further assistance. I would personally suggest you try these steps here:
Perform a Hard reset on the printer and make sure that the printer is connected directly to the wall outlet and not to the surge protector.
.
Remove all the ink cartridges and then try to perform a hard reset on the printer.
With the printer turned on, disconnect the power cord from the rear of the printer and also unplug the power cord from the wall outlet.
Remove USB cable, if present.
Wait for 2-3 minutes, press and hold the power button on your printer for about 30 seconds to remove any additional charge.
Now plug back the power cable straight to a wall outlet without any surge protector or an extension cord and then plug back the power cord to the printer.
Turn on the printer and wait till warm-up period finishes and the printer is idle.
Now insert the ink cartridges and then try to print a test page and check if it works.
Let’s first try and make a “photocopy” to determine whether the issue is with the printer or not. Place a document on the scanner glass and choose “Copy” option. If the printer is making a good copy, then the printer hardware is fine.
If the copy comes out bad, then I would suggest here is to follow the steps suggested in the support document for - HP Officejet, Deskjet 4600 Printers - Black Ink Not Printing and other Print Quality Issues
Step four: Use an automated tool to clean the printhead
Follow these steps to run an automated tool to clean the printhead.
CAUTION:
Never turn off the printer when ink cartridges are missing. Make sure you replace any missing ink cartridges as soon as possible to avoid print quality issues and possible extra ink usage or damage to the ink system. To avoid issues that require cleaning the printhead, always turn the printer off with the Power button on the printer itself.
Load plain, white U.S. letter or A4 size paper in the input tray.
On the printer control panel, press the Setup icon
![]() .
.Press the button
![]() next to the arrow
next to the arrow ![]() until Tools displays next to OK.
until Tools displays next to OK.Press the button next to OK to select Tools, and then press the button next to the arrow
![]() until Clean Printhead displays next to OK.
until Clean Printhead displays next to OK.Press the button next to OK to clean the printheads.
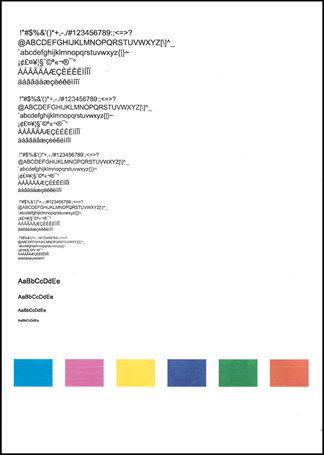
The printer cleans the printheads and then prints a test page.
Evaluate the test page for print quality.
Figure : Example of the printhead cleaning test page
![Image: Example of the printhead cleaning test page.]()
If the print quality on the test page is satisfactory, touch No to return to the current print job.
If the print quality on the test page is unsatisfactory, touch Yes to perform a secondary cleaning of the printhead.
There are three printhead cleaning stages. Complete all three stages if necessary. If the printhead is badly clogged, it might require another cleaning cycle. If so, wait 30 minutes after the last (third) cleaning stage to start the first stage of the cleaning process over again.
If the issue, persists, then contact HP phone support for further assistance as they will help you in real time in this regard.
HP Technical Support can be reached by clicking on the following link: http://hp.care/2r9wSvP
- Once the support page opens please select the country in which you're located. Next, enter your HP model number on the right.
- Next, choose the 'Contact Support' tab at the top and scroll down to the bottom of the 'HP Support- Contact' page to fill out the form provided with your contact information.
- Once completed click the 'Show Options' icon on the bottom right.
- Lastly, scroll down to the bottom of the page and select 'Get phone number.' A case number and phone number will now populate for you.
They will be happy to assist you immediately.
If the unit is under warranty, the manufacturer’s warranty should take care of it for you.
Please perform all these steps patiently as it is critical to resolving the issue. The trick is to remain patient.
Hope this helps. Let me know how this goes. I genuinely hope the issue gets resolved without hassles and the unit works great.  Please reach out for any issues and I'll be there to assist you.
If the information I've provided was helpful,
give us some reinforcement by clicking the solution and kudos buttons,
that'll help us and others see that we've got the answers!
Good Luck.
 .
. next to the arrow
  until Tools displays next to OK.