Thank you for joining HP Forums.
This is a great place to get support, find answers to your technical queries.
I understand that you are not able to print in color.
Are you using genuine HP ink cartridge?
Is copy working fine with the standalone printer?
Could you please help me with the exact operating system?
However, let's try to Align the printhead using the printer control panel.
From the home screen on the printer control panel, swipe left, and then touch the Setup icon
![]() .
.Swipe up on the display, and then touch Printer Maintenance.
Touch Tools, and then touch Clean Printhead.
A test page prints.
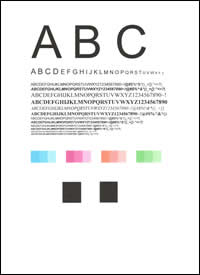
Figure : Example of the printhead cleaning test page
![Example of the printhead cleaning test page]()
Examine the test page.
If the print quality is unacceptable, touch Clean Again to continue the next level of cleaning. Repeat these steps for the third cleaning stage, if necessary.
NOTE:
If the printhead is badly clogged, it might require another cleaning cycle. If so, wait 30 minutes before you perform all three levels of cleaning again.
If the print quality is acceptable, touch Done.
 .
.
Make sure the ink cartridges are properly vented and seated correctly
Check the vents on the top of the ink cartridges. If they are clogged or obstructed, the ink cartridges might not work properly, which can affect print quality.
NOTE:
To avoid print quality issues and dried out ink cartridges, do not leave any ink cartridges outside the printer for longer than 30 minutes.
Press the Power button to turn on the printer, if it is not already turned on.
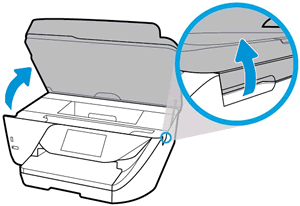
Open the ink cartridge access door.
The carriage moves to the center of the printer.
Figure : Opening the ink cartridge access door
![Open the cartridge access door]()
Wait until the carriage is idle and silent before you continue.
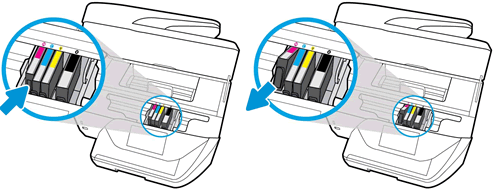
Press the tab inward on the front of the old ink cartridge to release it, and then pull up on the ink cartridge to remove it from the slot.
Figure : Removing the ink cartridge
![Pushing the ink cartridge inward and then pulling up to remove it]()
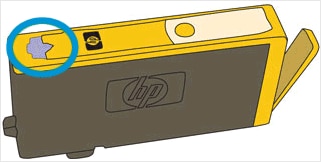
Examine the vent area above the HP logo on the top of the ink cartridge.
Figure : Examine the vent area on the cartridge
![Image: Examine the vent area on the top of the cartridge]()
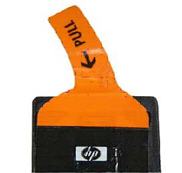
If the ink cartridge still has the orange pull-tab attached, pull to remove it.
Figure : Remove the orange pull-tab
![Image: Remove the orange pull-tab]()
If the vent is clogged, use a straight pin to gently remove excess adhesive from the vent.
Figure : Cleaning the clogged vent with a pin
Clogged vent
With a straight pin, gently remove excess adhesive from the vent
Unclogged vent
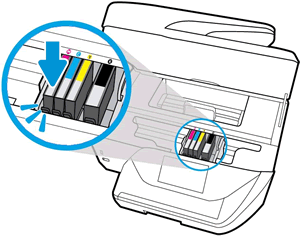
Turn the ink cartridge so that the cartridge contacts face downward, and then match the label color with the color dot on the carriage.
Slide the ink cartridge into its slot, and then gently press the ink cartridge down until it snaps into place.
Figure : Installing the ink cartridge
![Reinserting the ink cartridge]()
Repeat these steps to inspect the vents on each of the ink cartridges.
Make sure each ink cartridge is firmly installed in its slot. Run your finger along the top of the ink cartridges to feel for any that are protruding, and if any are, press down firmly until each ink cartridge snaps into place.
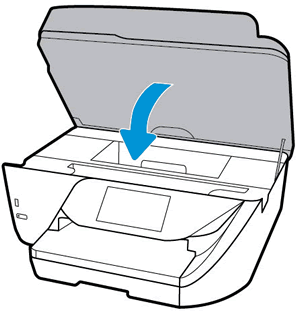
Close the ink cartridge access door.
Figure : Closing the ink cartridge access door
![Closing the ink cartridge access door]()
Try to print.
Keep me posted, how it goes! However, I'll try and follow up in next 24 to 48 hours to doublecheck on the issue.
If the information I've provided was helpful, give us some reinforcement by clicking the solution and kudos buttons, that'll help us and others see that we've got the answers!
Have a great day!
Cheers